Installing user Docker
Since v0.3, Light Store can be installed using Docker & docker-compose.
This is the preferred way to install as it is OS-agnostic and provides pre-configured components (like a PostgreSQL database, reverse proxy, redis cache) for set up.
Follow this guide closely and you should have little to no problems setting up the store.
Prerequisites
Before you begin, this guide will assume a fresh installation of a Ubuntu 24.04 full-root server.
This guide should also apply to any other OS that docker and docker-compose work on, like Windows, MacOS and other Linux distros.
-
For linux-based distros, you may refer to Docker Engine Installation Guide for Docker installation guides related to your specific platform.
-
For Windows & MacOS it is recommended to use Docker Desktop for Windows or Docker Desktop for Mac.
Installing Docker
To install Docker it is usually recommended to follow the guides for your operating system linked in the prerequisites.
These steps are the recommended Docker installation steps for Ubuntu 24.04 taken from the Docker engine installation guide.
Set up Docker’s apt repository:
# Add Docker's official GPG key:sudo apt-get updatesudo apt-get install ca-certificates curlsudo install -m 0755 -d /etc/apt/keyringssudo curl -fsSL https://download.docker.com/linux/ubuntu/gpg -o /etc/apt/keyrings/docker.ascsudo chmod a+r /etc/apt/keyrings/docker.asc
# Add the repository to Apt sources:echo \  "deb [arch=$(dpkg --print-architecture) signed-by=/etc/apt/keyrings/docker.asc] https://download.docker.com/linux/ubuntu \  $(. /etc/os-release && echo "${UBUNTU_CODENAME:-$VERSION_CODENAME}") stable" | \  sudo tee /etc/apt/sources.list.d/docker.list > /dev/nullsudo apt-get update
Install Docker:
sudo apt-get install docker-ce docker-ce-cli containerd.io docker-buildx-plugin docker-compose-pluginTest Docker:
sudo docker run hello-worldIf this test works and prints a hello world, you’re ready to run the app.
Running Light Store
Download the provided product .zip from BuiltByBit or another licensing site in version v0.3 or above.
Once downloaded, unzip it on your target machine. On Ubuntu, this can be done using unzip Light\ Store\ v*.*.zip.
You can now change-directory into the unzipped directory and run docker-compose.
cd Light\ Store\ v*.*Install store
Install the store by running:
php artisan app:install --keyThis will prompt you for the hosting solution (either “docker” or “local”, choose “docker” when following this tutorial) and the final page url.
For non-https the URL will be http://your-server-ip:app-port, by default http://your-server-ip:8001. The port (8001) can be customized in docker-compose.yml.
For https, you will require a domain, generate a certificate, and use port 443 or native Nginx to proxy requests internally.
Starting Compose containers
sudo docker compose up -d --buildThis command will run the docker-compose containers, as well as build the local image (required for this project).
The -d flag is used to detach from the running program so that leaving the command line does not cause the store page to terminate.
You should now observe docker compose download appropriate images, build the local image and eventually running them. Depending on the speed of your machine, this can take up to 10 minutes, so be patient.
Troubleshooting: Too many unauthenticated pulls
In this case, please log in to Docker Hub using the following command: shell docker login
Once complete, docker-compose will list the containers are “Started”.
Pre-v0.5
For versions before v0.5, you will need to run the following commands instead:
shell sudo docker compose exec -it store-app-1 cp .env.docker .env shell sudo docker compose exec -it store-app-1 php artisan key:generate shell sudo docker compose exec -it store-app-1 apt-get update && apt-get install -y nano shell sudo docker compose exec -it store-app-1 nano .env // Edit in your store url, exit & save with Ctrl + x Navigate to this URL to see your store in action.
http://<your server's ip>:8001Setting up the queue worker
On your host machine, create a new file in /etc/systemd/system/ called lightstore.service and add the following:
[Unit]Description=Light Store Queue WorkerAfter=docker.serviceRequires=docker.service
[Service]User=rootGroup=rootRestart=alwaysExecStart=/usr/bin/docker exec store-app-1 php artisan queue:workStartLimitInterval=180StartLimitBurst=30RestartSec=5s
[Install]WantedBy=multi-user.target
Then run the following commands to enable the service and start it:
sudo systemctl enable --now lightstore.serviceThis should start up the queue worker. Check status by running sudo systemctl status lightstore (should say active (running))
Default login & creating your user
Once you’ve got the page running, try logging in as admin using the default credentials:
Email: admin@admin.comPassword: adminYou should then be able to access the admin panel visible at /admin, or via the button in the profile dropdown menu.
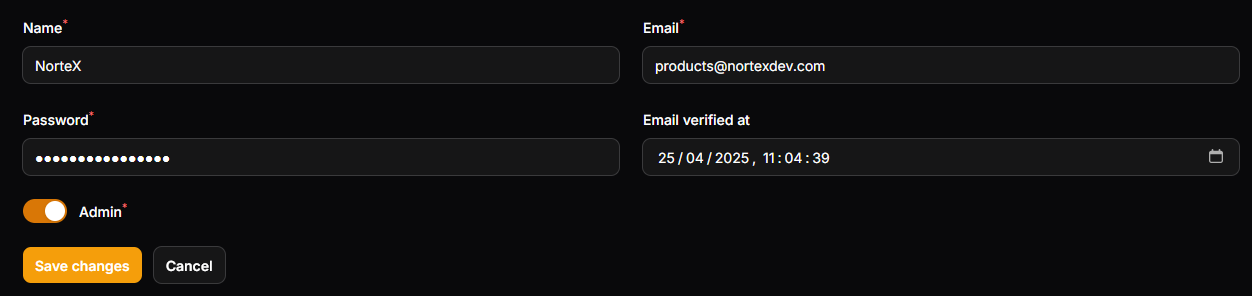
Once in Admin, head down to the Users tab:

and create a new user for yourself, making sure you mark yourself as “Admin”.
Log out via the profile panel on the main page and re-log to the admin panel using your newly created account.
Next, delete the default admin@admin.com account. This step is very important for security, as, if not addressed this account could easily be used to access your admin panel.
A less secure option, but also viable, is to simply change the password of the default admin account, however this is not recommended, due to possible bruteforce attacks.